
Drywall is the most frequent wall coating of the the current home. The drywall is glued and nailed/screwed to the wood frame of your home and then the ties are then plastered and sander. All through the life span of any home harm to the drywall will require place often when the moving furniture or playing indoors. There are two methods to fix this injury – band a professional and pay them to remedy it or learn to fix it yourself. Most repairs are rapid and simple related to a couple of instruments to perform the job
Correcting cracked drywall joints can be frustrating at best. If you have just a really, very small crack provide, you may well be able to damage out the split to a broader measurement and then just apply new spackling compound. Employing a sharp, directed instrument such as for instance an old designed may operator (church key), scratch put a rhythm greater and somewhat longer compared to the crack. It needs to be at the least 1/8″ heavy but deeper is better. There are patching ingredients accessible today built simply for patching chips but aren’t meant for big areas. If this can be a decorated wall some total sanding will also be required. Spackle won’t stay glued to an easy decorated finish. Mud the area across the break at least a couple of inches wider compared to split and then go ahead and apply the patching compound ensuring you force the spackle into the crack. Right after using the spackle, re-wipe the region along with your blade to get rid of any excess spackle from the area leaving an appartment surface. Based upon what sort of compound you purchased the drying instances differ a great deal from moments to hours. After the spackle is totally dried work with a 100 or 120 resolution drywall sanding paper to smooth place so it’s flush with the present wall. Prime the drywall and deploy the ultimate paint.
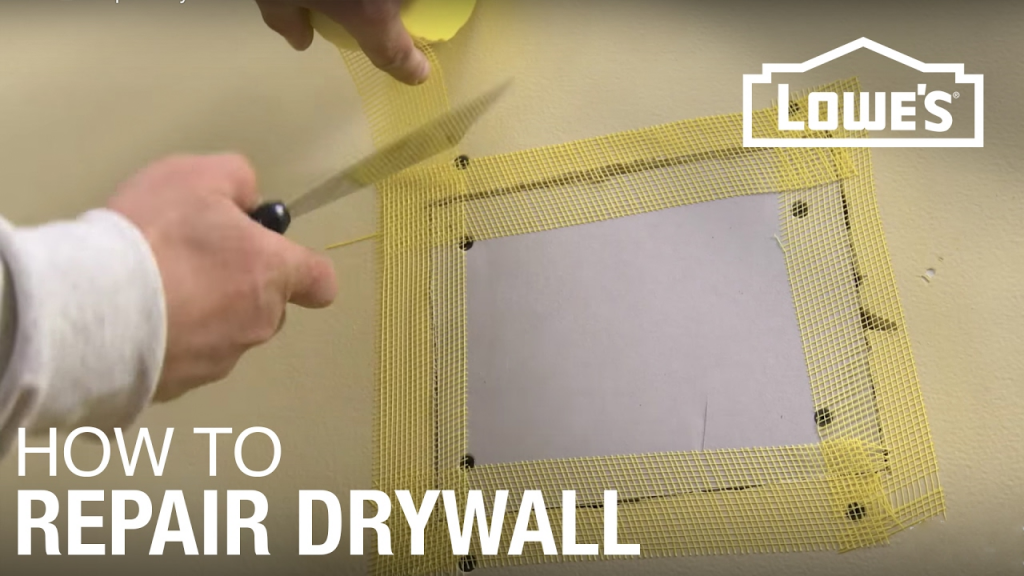
In a case where in fact the cracks are much greater over the joints, it may brought on by the drywall record dragging loose, physical injury or maybe even excess moisture. Cautiously eliminate any and all loose resources at recorded areas. You can’t and I replicate, can’t re-spackle old tape. The drywall tape has second holes that enables the spackle to pass through and anchor the record to your seams. The spackle “wets” the tape supporting it not just to stay glued to the drywall but allows the spackle to create a connection on both sides to the drywall. Once it’s applied, the openings are filled thus creating the tape useless. Attempting to short cut will simply cause the seam to re-crack later.
After eliminating all loose components, gently mud the ruined parts being cautious not to split or mud through the paper coating of the drywall underneath. Once the location is smooth to the touch make sure you have sanded equally onto the encompassing area so as to not leave an edge that’ll show through the completed work. Utilizing a six inch large spackle knife, put in a actually coat of new spackle over the seam. Place your drywall recording on the seam and utilising the knife, push the recording strongly onto the drywall removing all surplus spackle since it squeezes out of under the record and edges of the knife. Do not eliminate a lot of spackle to be able to leave the paper dry. When the region can be as easy as you can make it, apply a second light fur over the same area ensuring the brand new recording is totally stuck in new spackle.
After drying for one day to assure all the spackle is dried, re-sand the whole region to once more get an easy sense to the entire repaired area. Making use of your twelve inch knife, spread another fur to the entire restoration making certain you mix smoothly onto the adjoining wall surfaces. Don’t keep any ridges or sharp ends where you meet up with the old wall finish.
When this 2nd coat of spackle is dry, which is drywall contractor significantly less than the beds base coat since it is a lot thinner, use, using your twelve inch knife, a next very slim coat of new spackle. You will very nearly be able to look out of this coat as it is used to fill little indents or scores left by sanding the next coat. Again following the 3rd fur cures, very lightly sand the restoration for the last time and energy to promise a completely clean finished area. Apply a fur of drywall primer to seal the just fixed drywall place and then color your wall.